Marcus's Blog
Free Software, Free Hardware, Free Society
Setting up a Freedombox on BBB to host a Blog
![]()
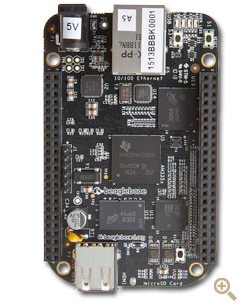
On my quest to self-hosting I have set up a Freedombox on a Beagle Bone Black. I have chosen this device because the hardware design is freely available and the core components can run without proprietary software.
In order to boot the Freedombox Image from a sdcard, I had to make sure that a specific version of the official eMMC image is flashed in advance. I have noticed that Freedombox won’t boot if the Debian 8.3 version is used on eMMC. I guess this is due to an incompatible u-boot version. I downloaded the Debian 7.9 image and flashed it to the eMMC according to the guidelines on their website. Afterwards I was able to boot the Freedombox Image from the sdcard. The images that are currently available are based on Debian Unstable. Freedombox itself is considered as unstable as well, so one need to life with some inconveniences.
I have connected the Beagle Bone directly to my router, using Gigabit Ethernet, so the Freedombox resides behind a NAT gateway (for IPv4) now. After first boot, the box is accessible via WebUI on https://freedombox.local – it makes use of a self-signed certificate, but afaik Let’s Encrypt integration is on the Roadmap. I had to specify an Admin Username and Password. The credentials can also be used for SSH access, which is very handy. Before I started to install applications in the WebUI, I logged in via SSH and became root using sudo su -. The first thing I wanted to do is to upgrade the installation base, as the image of the Freedombox was a few month old, and Debian Sid ages quickly ;).
I run a apt-get update && apt-get dist-upgrade and noticed that some of the packages could not be updated correctly, so I fired up a apt-get -f install afterwards, which fixed the issues.
After a reboot, I logged back in to the web interface and installed my first application, which was ikiwiki, as it offers an easy Blog setup.
Making the Box available on the Web
There are some options available to make the box visible on the web. The easiest one is Pagekite. The advantage of Pagekite is, that no configuration on the router is necessary. The disadvantage is that it’s a paid service, even though it’s a Pay What You Want model and the company behind it seems to be very Free Software friendly.
After registration, a default Kite secret is displayed in the Account Details. This secret and the Kite name is necessary to setup Pagekite on the Freedombox. First of all, the application needs to be installed within the WebUI. Afterwards the account details can be entered in the Pagekite configuration dialog. In the services section, you can select which services should be visible on the web. HTTP should be enough to propagate the Blog to the internet, but HTTPS might be a good choice if services like Owncloud should be available as well.